Sunday, November 01, 2015

Toilet Paper and Potty Posters


While attending Rutgers University (many, many years ago) our Resident Adviser would disperse important university and dorm information by hanging a sign on the back of the bathroom stall door. The sign included important, fun and educational information. All these years, I thought this was a clever way of keeping folks informed. Where else do you have someone's undivided attention? Introducing my version of these collegiate signs which are hung in our staff bathrooms.


Toilet Paper is the informational, educational and fun sheet. The fonts are from Kimberly Geswein.


Each Potty Poster is an inspirational, motivational, or funny quote to get folks thinking or to uplift spirits. The fonts are from Kimberly Geswein and graphic backgrounds are from Mad Scrapper on Etsy.

Each issue of Toilet Paper and Potty Poster comes out every 2-3 weeks. 


Toilet Paper contains the following sections: 

  • A Message - either a message from me, a story,or a photo
  • Uber Facts - random facts I pulled from Uber Facts on Twitter
  • Random Acts of Kindness Challenge - kindess ideas to attempt over the next few weeks
  • Healthy Tips - just that - healthy tips found via Twitter, Facebook...wherever
  • Tweets - Twitter Tweets that stuck with me and are worthy of sharing
  • Stay Current - current educational news
  • Tech Tools - handy technology tools
  • What's Happening - upcoming community events with locations, dates, times and contact information

I purchased these SourceOne Deluxe Sign Holders 10 Pack from Amazon and these Command Strips from Amazon. We have four staff bathrooms -2 sign holders and 8 command strips per bathroom. I print each Toilet Paper onto colorful Astrobrights copy paper. This Astrobright set - called Happy - from Amazon is my favorite (I use this paper for everything school related).

I have received such positive feedback from my staff! Amazing how something so small can be enjoyed and appreciated so much!

As my gift to you, get the first 4 Potty Poster signs by clicking below. You can download and print these for free! Future signs will be sold in my blog shop. Check out Kimberly Geswein's amazing fonts by clicking here!


Please note: Use my idea as a springboard to your own idea! While Toilet Paper and Potty Posters are my idea - you can come up with your own name for these documents and create a version that makes sense for your school. Enjoy!


Saturday, September 05, 2015

Stay Hydrated!

Usually the products I post about have something to do with the services we provide to our students, staff, and families. This post has nothing to do with "school stuff"....but I needed to share with you because as educators we are so busy and don't always get to grab a drink when we need one or when we'd like to. We are in the "talking" business and my-oh-my, does my throat get dry - especially at the beginning of the school year when I'm trying to get back into the swing of things. If you are looking for a new travel mug and/or water bottle, I wanted to suggest the following.

I wanted to end my frequent stops to pick up a coffee on the way to school, but, my travel mug was useless in keeping my coffee hot. The coffee was often lukewarm by the time I arrived at school. So, in search of the perfect travel mug, I came across this 16 oz. Zojirushi SM-KHE48NL stainless steel mug in Champagne Gold. The past two days I've filled it up at 7:00 a.m. and my coffee was still hot after lunch. Usually I finish my coffee much quicker, but I've been so busy the past few days that my coffee took the back seat. This item works! It is a bit on the pricey side, but does the job and will save me money in the long run. It is smaller than I thought it would be, but holds the perfect amount of coffee each morning. It easily fits in my car cup holder for my trip to school.


Likewise, I was in search of a nice-sized water bottle that would keep my water cold all day! I was so tired of drinking lukewarm ice water in the afternoon. So, I purchased the 24oz. Hydro Flask stainless steel water bottle in Green Zen and tried it out this week. It was in the 90's here and my office has been about 91 degrees the past three days. In my eyes, this was a true "coldness" test. I filled up this bottle with ice and water at 7:00 a.m. three days this past week. As of 8:30 p.m. each day I had a little bit of water left inside. I couldn't believe it, there was still ice in the water bottle and the water was still cold!!! Again, this bottle is a bit on the pricey side, but will save you a ton of money if you are a bottled water purchaser. The opening on the top is a bit small...so, only small ice cubes will fit.

Stay hydrated and enjoy!


Saturday, August 29, 2015

YOU ARE Bulletin Board -- Follow-Up

I've been asked by many to show a photo of the finished product of my YOU ARE bulletin board hanging in my school hallway. Here it is!! Clean, simple, and refreshing...I think! 

While I was hanging it up, it sparked a conversation with a staff member who was enjoying the positive message. It got me to thinking - if someone is having a difficult day (students or staff, etc.) then maybe one glimpse at this board will remind that person what a gift he/she is and lift his/her spirits. Never know....

Another quick tip...find a local printer who will print out your projects for you at a minimal cost. I have a wonderful printer down the street who allows me to email my files to them, I tell them the size and paper for each piece, they print the document for me in color or b&w, and I swing by and pick up the order (and pay for it of course). So, when I sent this project to be printed I asked for the YOU and ARE pages to be printed on 11x14 gloss stock, one side full color and the rest of the pages in the file on 8.5x11 gloss stock, one side full color. The bigger YOU ARE signs made that stand out and the gloss stock prevented me from having to laminate everything (it's shiny). I find it way cheaper than using my printer's color ink for projects like this!!

You can get your very own YOU ARE bulletin board by clicking on the here or on the photo below. It's all ready for you, just purchase, download, print, and hang. That's it...instant inspirational bulletin board!

Enjoy!!


Click on the graphic below to purchase this bulletin board!

Saturday, August 01, 2015

YOU ARE...Bulletin Board


It was hard for me to believe that my free downloadable BE YOURSELF bulletin board was such a huge hit with all of you. Something so simple, but so well liked. Many of you commented how you appreciated that it was ready to go - print and display! So, I thought it was time for a BE YOURSELF follow-up bulletin board that is perfect for the start of a new school year.  

YOU ARE...is a much more subdued bulletin board that my past work of bright colors. The title words have a "beachy" feel. The sayings are all in black and are "written" on graphic school paper backgrounds. I thought this would like like they were handwritten with a felt-tip marker or a pencil. There are two sheets for the title words and then 9 pages of positive thoughts/sayings (20 sayings in all) in this particular document.

YOU ARE... is available for a nominal fee by clicking here -- just download, print and display on your school bulletin board. The sayings are perfect for "back-to-school" and to give passers-by a pick-me-up upon reading. 

I hope you all will enjoy this document too and will make your life a bit easier as you get your spaces ready for back-to-school!


Friday, July 31, 2015

SWPBIS Character Lesson #2 - A Day Without Rules!


I needed to create a lesson that focused on why rules are necessary. Because I have a short amount of time in each SWPBIS (School-Wide Positive Behavior Intervention and Support) character lesson, I wanted to find a very basic children's book to help with the lesson. I found the book A Day Without Rules by Billy Boston. The book simply depicts what happens in a "rule-free" classroom. The students quickly realize that things are no longer "fair" and that they are very "unhappy" together. The students plead to have their rules reinstated.

Whenever I read a story I always engage the students in a discussion - asking loads of questions as we go. Following the lesson, I have students complete a work page. As I explained in SWPBIS Character Lesson #1, I usually have students complete some sort of work page during the character lesson.  The students take this workpage back to their classrooms to share with their teachers and they also take it home to share it with their parents/guardians.

Below is the workpage that goes along with this lesson. In the ovals: students write down what life would be like without rules in their classrooms and/or in the school. In the heart: students write down why rules are necessary. We have a discussion about the ovals and the heart - and I extended it to include a "rule-less" neighborhood/community. In the box at the bottom: students should reflect on their past behavior and indicate the rules he/she will work on in the following months. Click on the picture below to print the workpage.


Enjoy the lesson!


Sunday, July 26, 2015

SWPBIS Character Lesson #1 - My Mouth is a Volcano

Students who have not earned the monthly school-wide incentive in our school's School-Wide Positive Intervention and Support (SWPBIS) program are required to attend a character lesson during the incentive or on the same day as the incentive. Each 30-45 minute character lesson is usually taught by me, but depending on the incentive is sometimes taught by a classroom teacher. 

The character lesson topics are often agreed upon by our SWPBIS/Social-Emotional Learning Committee prior to the lesson date. But, truth be told, I often choose the topic and develop the lesson based on what those students are demonstrating a need in or what I hear from classroom teachers as the presenting need.

For character lessons, I often group together grades K, 1 and 2 and group together grades 3, 4 and 5. I attempt to use the same books or video clips, but modify any written portion to meet developmental levels. There are times when I plan two different lessons. I never know how many students I will have for each lesson, so I tend to plan on 30 per group (last year I never hit that number - in fact - never close). Many of my ideas come straight out of my own noggin....but Pinterest also comes in handy to jump-start any ideas!

So far, I have not recycled any of the character lessons -- so I plan on posting on the blog a bunch of these planned character lessons for you to use with your students!


SWPBIS Character Lesson #1: My Mouth is a Volcano

Often students make poor choices in the words they decide to use with peers and adults. I felt it was necessary to do this lesson pretty early on in the school year. I also took the opportunity to teach and discuss the concept of cause and effect.

1. I read the book My Mouth is a Volcano by Julia Cook and engaged students in discussion throughout. I love children's literature - use it often and plan out ahead of time what questions to ask and where I'm "going" with the story. I wanted to pay close attention to the consequences so my questioning guided this learning/discovery. I often write my questions on sticky notes and either put on the pages or just inside the cover of the book so I have them for the next time I read it.


2. Students then received the following workpages to complete independently. I tend to include some sort of written portion to the lesson - this is something tangible they can take back to their classroom to discuss with their classroom teacher AND something tangible to take home to discuss with their parents. I do think, however, that this year I will be adding some sort of disclaimer on every SWPBIS character lesson workpage that it was part of a character lesson activity that took place in lieu of the incentive. I always bring pencils to the location we are doing the lesson and I give the students the pencils and sheets when I'm ready for them to have them. This way, I don't have to worry about pencil playing during the lesson. K, 1 and 2 are encouraged to either write their response or draw their response. If they draw a response, I will write what they are describing in the drawing on the work-page.

K, 1 and 2 (1/2 sheet)


3, 4 and 5 (whole sheet)


3. After students complete the workpage, we reconvene and share out.  Students can comment on other student's work and also I find that they then give advice or make connections.

4. The last portion of the lesson included Cause and Effect scenarios. On sticky notes I wrote either a behavior (cause) or a consequence (effect). Some cause examples: yelling at a teacher, calling a peer stupid, etc. Some effect examples: time out, trip to the principal's office, peers wanted to play with him/her, etc. I arranged the sticky notes in a circle on a magnetic white board and put the following magnetic spinner in the middle. By the way, I use this spinner often - usually in games I create for small support groups. It adds a bit of fun and gets the kids up and moving! 


Then each student gently spun the spinner. If it landed on a behavior the student had to state a possible consequence. If the spinner landed on a consequence, the student had to state a possible cause. The K, 1 and 2 students stated their responses aloud and the students in 3, 4 and 5 wrote their responses on the following sheet. I reviewed all written responses after each spin and before moving ahead to the next one.


5. Students take all workpages with them back to their classrooms.


Saturday, March 28, 2015

SWPBIS How To! The Program: Part 2 - Incentives and Character Lessons

My two previous blog posts on our School-Wide Positive Behavior Intervention and Support titled SWPBIS How To! Year of Preparation and SWPBIS How To! The Program - Part 1 described for you the planning process and the basics of the program. In this post, I will get into the rewards, character lessons, data collection and data use, and Tier 2 interventions. The purpose of this SWPBIS series is to pass along to all of you the learnings we had as we jumped into this process and different way of doing things at our school. We continue to reflect and tweak in this year three of the process.


Students need to earn these particular rewards and incentives - based on their daily behavior/effort and their daily color chart colors. The colors take some of the subjectivity out out of earning rewards - the rules/expectations are the standards and we expect our students to achieve them.

The Program - Part 2

1. Fun Friday 


Fun Friday is a 30 minute block of activity/station time that occurs each Friday or other pre-determined date. For 1/2 day Kindergarten, Fun Friday is a 20 minute block of time. Teachers set-up fun station classroom activities which are developmentally appropriate for each age group. Activities such Legos/Kinex, computers, jewelry making, art and craft projects, drawing, reading, building blocks, cars, Twister, dolls, drawing on the board, board games, etc.  There should be a variety of fun activities and these activities can change from week to week. There is a limited number of students who can participate at each activity. Throughout the week, students earn their Fun Friday minutes. Students who have the most purples and blues over the course of the week get to choose their activity first. Then students who have green. 

If a student earned a yellow during the week, he/she must sit out for 5 minutes and then choose an activity that still has an open slot. If a student earned more than one yellow during the week, he/she must sit out 5 minutes for each yellow earned and then join in the activity. 

Each orange earned is 10 minutes of time-out during Fun Friday AND the completion of a goal sheet. The goal sheet asks students to write down what he/she will do differently next week so he/she can earn all of their Fun Friday minutes. After sitting out the required minutes, the student joins in an activity that still has available slots.

Each red earned during the week nets 15 minutes of time-out during Fun Friday AND the completion of a goal sheet. If a student earned 1 red and sat out the required 15 minutes, he/she can join an activity that has an available slot. Two reds earned means no Fun Friday for the week.

Learnings About Fun Friday: Change up the activity/station options from week to week to keep it interesting for the students. Poll the class on what types of activities are fun for them. There should be a variety of activities to encourage choice (working towards more blues and purples) and so that students have a better chance at choosing something they enjoy doing. If there are students who must complete a goal sheet, it would be helpful for teachers to spend a few minutes with these kiddos to guide them during this activity. 

2. Monthly School-Wide Incentives

Each month, students can also earn the school-wide monthly incentive. Before the school year started, our committee decided on the monthly incentive dates and decided on what activity each monthly incentive would be. This makes it easier to plan for and to communicate with staff and parents. Students who earn enough greens, blues, and purples for the month have earned the right to participate. Those who do not earn the school-wide incentive must participate in a character lesson instead. The monthly percentage of required greens, blues and purples gradually increases throughout the school year. 75% greens, blues and purples are needed during the first marking period, 80% in the second marking period, 85% in the third marking period, and 90% in the fourth marking period. We account for days absent when figuring on the monthly percentage. Fun Friday does not occur during the week of the monthly school-wide incentive (only the monthly incentive occurs that week).

Last year (the first year of our SWPBIS program) we polled the student body to find out what monthly school-wide incentives they enjoyed the most and what school-wide incentives they would like to see this year. The kids really seemed to enjoy sharing their opinion and felt they had some say in what the incentives would be this year. So, when our committee met before school started, we incorporated as many of their ideas as possible. Some examples of monthly incentives include: pumpkin patch/pumpkin painting, dancing in the halls, door decorating, school-wide bingo, walk for Italian Ice, ice cream truck, egg-cellent behavior hunt, community project for Meals on Wheels, sports day, outdoor chalk drawing, school-yard beautification project, etc. We worked really hard to come up with ideas that didn't cost a lot of money (if any at all) and had some variety from month to month. We do welcome donations from our school community and outside partners to make this program run. 

The students often say, "This was the best day ever!" The monthly incentives do not need to be extravagant....but they do need to be meaningful, sometimes novel, and fun. We are starting to involve our Student Council in some of the decision making process regarding the monthly incentives. 

Learnings About Monthly School-Wide Incentives: Planning for these is very, very time consuming and eats up a large chunk of time during our monthly committee meetings. Plus, there is always more to do beyond those monthly committee meetings. Try to work 2 months ahead for each incentive -- this will give you more time to get any needed materials. You will need to plan for the specifics - because the details will need to be communicated to the entire school community: time, procedures, where, the schedule, how, what, etc. Committee members should all have a job. The parents/guardians enjoy the pictures on the school's Facebook page or school website.


3. Character Lessons

Students who do not earn the monthly school-wide incentive attend a character lesson during their grade-level's incentive time or on the same day as the incentive. The committee decides on the monthly character lesson topic and I usually develop and teach the lessons. Depending on the incentive, a grade level teacher may teach the lesson or the lesson is co-taught by a teacher and myself. The number of students for character lessons each month will fluctuate. For example, as the monthly percentage cut-off increases, the number of students in the character lessons increase. Also, when there are fewer days of school during a month (i.e. snow days) the students schedules are thrown-off (which results in behavioral changes) and there are fewer days used in the calculations to earn the required percentage.

I develop the character lessons from my head - usually - but Pinterest does come in handy - especially when time is tight! I will be posting some of my SWPBIS Character Lessons here on the blog in the months to come.

Learnings About Character Lessons: Plan these out - do not "wing-it." A number of kiddos with challenging behaviors may be sitting in front of me and I have found a detailed game plan is best. I want to make the best use of this time I have with them - so I want to teach a skill/concept, practice a skill/concept, and have the students reflect on how they will use that skill/concept in the future. I have found that pairing up grade levels by age group works best...K and 1, 2 and 3, 4 and 5. BUT - there have been times that I've split up the grade levels or paired up other grade levels depending on what students I will be servicing, how many students I will be servicing, or the time the lessons are occurring. I also try to do some sort of workpage during the lesson...I want the students to take this back to share with their teachers and take it home to share with their parents. I really do attempt to focus on how they can make next month different for themselves - so they earn the school-wide incentive.


Friday, January 02, 2015

SWPBIS How To! The Program - Part 1

I'm frequently asked about strategies for behavioral interventions for students. I have a lot of practice in this and I do share some ideas. However, the biggest learning over the course of my career has been to do whatever I can to be pro-active and preventative. Often as school counselors we are putting out fires until the problems pop back up again (in essence servicing a few). I've had to make a shift in my thinking from constant fire smoldering to putting a lot of time and energy into servicing all students -- school counseling core curriculum -- teaching skills! The school counseling core curriculum, in addition to, our school's Social Emotional Learning Curriculum (PATHS and Olweus) and our SWPBIS (School-Wide Positive Behavior Interventions and Supports) program has lead to school-wide common language/behavioral expectations and a more systematic/data driven way of intervening with students - individually, in SWPBIS Tier II intervention groups, and small support groups. In this second year of implementation, as a committee and as a staff, we are still learning. Side note: the fires will always be there...but all of the other programs in place give a bit of a framework to teach and/or re-teach the needed skills these kiddos are seeking.


My post, SWPBIS How To! Year of Preparation, explained all that went into the year-long planning for our School-Wide Positive Behavior Interventions and Supports Plan. Our committee put in a lot of time and effort into coming up with a program that made the most sense for our school. Check it out if you are thinking about getting one started in your building. This post is going to focus on the actual SWPBIS Plan that we developed. I've decided to write about SWPBIS - primarily because of the amount of questions I'm asked via the blog and Facebook page regarding behavioral interventions, but also because this is a school-wide effort that is making an impact on our student's behavioral choices and ultimately their performance in the classroom. It is my hope that you will take a little something from our learnings. 

The Program - Part 1

1. School Rules

During our initial SWPBIS Commitee meetings, we spent a whole lot of time hashing out our school rules. Coming up with the 3 main school rules was the easy part: Be Respectful. Be Responsible. Be Safe. But, developing the expectations for each of those rules was the challenging part. Wording meant all the difference.The expectations needed to be specific and concise. They also had to describe the most important positive behavior that we were looking for in each location.

We wrote expectations for each of the 3 main school rules in the following school areas: Classroom, Hallway and Stairwell, Bathroom, Cafeteria, Playground and the Bus. Below is an example what we decided on for our Hallway and Stairwell expectations. We did our best to write all expectations in a positive voice (although for some that just didn't work). 


Hallway and Stairwell
·       Walk silently in line; don’t disturb other classes
·       STOP, LOOK & LISTEN when spoken to by an adult
·       Use your “inside voice” and appropriate language during arrival, locker times, and dismissal
·       Go directly to your classroom
·       Use your locker only at assigned times
·       No food, drink, gum, or cell phones
·       Walk at all times staying to the right
·       Keep hands, feet, and objects to yourself
·       Stay with your class or buddy

All of the school rules and expectations were put on one page (it looks like a matrix/grid with rows and columns as seen above). We had this page enlarged and printed on poster-size cardstock at a local printer. Each classroom received one of these large rules posters. Then we made smaller posters for each school location (ex. Hallway and Stairwell). The small posters were hung in each location as a reminder for the students. Finally, for the bathroom and lockers, we made small reminder pictures that hung in the appropriate area. For example, on the soap dispenser we put up a graphic that reminded students "1 pump" and near the lockers, we had a visual reminder of what materials students needed with them in order to be "Ready to Learn" for the day.

Lessons Learned Regarding the School Rules - during your year of preparation, set aside enough time to get the rules just right. Also, once the committee has a product, share it with the staff to get feedback - to make any changes. You do not want to keep changing the rules from year to year...so again, they need to be as everyone wants them.

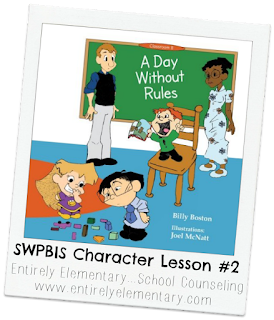
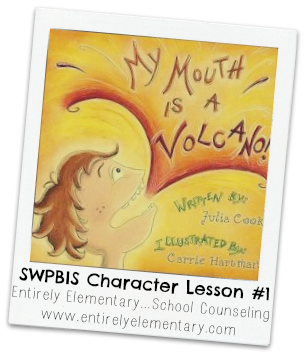
2. Teaching of the Rules and Modeling of the Rules

Lesson plans were written in order to teach and model the school rules to the students. The teaching and modeling occurred over the course of the first week of school. Classroom teachers were primarily responsible to teach many of the rules lessons. However, grade levels rotated through stations in the cafeteria, for the bus students, and on the playground. Support staff helped to teach and model the school rules and expectations in these environments.

Lessons Learned Regarding the Teaching and Modeling of the Rules - While this is done during the first week of school, the rules and expectations need to be constantly revisited (taught) and constantly modeled. When modeling SHOW students what each expectation looks like (so there is no question about what the adults expect). Cafeteria and playground tend to be the most difficult areas for students to meet expectations primarily because the time is more unstructured. So, I suggest training the cafeteria/playground monitors AND have them present when teaching to and modeling the rules for the students. This will help everyone be on the same page.

3. Classroom Color Chart

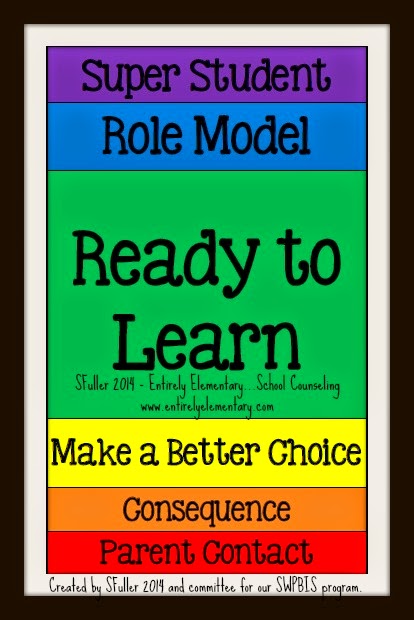
I've read a few articles that talk about PBIS and the contradiction of using color charts. Some say they focus on the negative, some say there should be no "negative" in SWPBIS, some say that the negative should be the office referral (in fact many schools use only office referrals as a measure of the effectiveness of their SWPBIS program). I have my own thoughts about this...yes, schools need to have school-wide rules, common language and common expectations. But in schools, kids need to practice how to change their behavior, kids need to see their effort doesn't go unnoticed and pays-off, kids need to learn how to take responsibility and be held accountable for poor choices, and kids need to feel a part of a school and classroom community. Then, we need to keep data on how this Tier 1 program (color chart, etc.) is working with kids because we should be preventing office referrals. In my eyes, I want student active engagement to be maximized in the classroom, student performance to increase, and I want kids to learn life lessons (soft skills) in regard to their behavioral choices and the consequences of their choices. Our committee decided to go with a fluid color chart. Fluid is key here...students retain the control of their behavioral choices and can at any time turn a day around.

Hanging up in each classroom is a Classroom Color Chart. They are made from colored foam pieces (to match the above color chart) taped together. Each Classroom Color Chart hangs in a prominent and easy-to-get-to place in the classroom.

Each student has a clothespin (clothespins have student names written on them in marker). We call them "clips." The boys clips are on one side of the chart and the girls clips are on the other side of the chart. Each morning, students begin with their "clips" on GREEN (Ready to Learn). The Classroom Color Chart is fluid...students clips can move up and can move down throughout the day. As students meet school expectations and/or go above and beyond, their clips move up. As students make poor choices (after 1 warning for minor poor choices), their clips move down. Because the chart is fluid, once a clip is moved down, students are expected to turn around their behavior so their clips can move back up. 

At the end of the day, teachers record the color students finished their day on. If a student at some point throughout the day landed on orange or red, on the data sheet there would be two colors (that color and the color the student ended the day on). Student colors also go home daily. They are either marked in the assignment books (of the older kiddos - 3, 4 and 5) or on the monthly calendars for the students in K, 1 and 2. Teachers also keep their own montly data sheet to record the color of every student for the whole month. This is the data we look at to determine program effectiveness and intervention needs.

Lessons Learned Regarding the Classroom Color Chart - Foam is not the most durable material. Maybe use laminated cardstock. As warnings are given, maybe move the clips closer to that next color - to visually remind students that they have received a warning. Another idea for this is flipping the clip over upon the warning. Again, this is a visual reminder for the kids AND the teacher. The clip movement is FLUID - the clips can move up and down all day. Think of the color chart as a "gauge" for student behavior - it lets students know how they are doing. If they are making some poor choices, they need to make better choices and change their behavior. For our committee, we felt this was an important skill for kids to learn and practice - making behavioral changes. For teachers - there is certainly a "time" element involved in carrying out this program with fidelity. Time to teach and re-teach the rules, time to put classroom management skills to work and effectively move clips, time to discuss with kids when they are making poor choices and positive choices, time to communicate with parents, and time to mark student colors down daily (to name a few). All of these "time" examples do pay off in the long run, but be prepared for some resistance. Rely on the leadership of committee members to help with any resistance that may occur. We continue to learn each and every day on how to make this program more effective. Gather staff feedback to help.

4. Chart-on-the-Go

The Chart-on-the-Go is a clipboard version of of the larger classroom color chart. This chart goes with each class when they are on the move - hallways, bathroom breaks, cafeteria, playground, assemblies, etc. Student clips begin on green, the clips can move up and down in all areas of the school and the movement is recorded on the Chart-on-the-Go. If a student's clip moves while outside of the room, he/she would move his/her clip that many spots upon return to the classroom. So, if a child's clip was on blue in the classroom and chose to yell in the hallway (clip moved to yellow), upon return to the classroom, the child would move his/her clip down one space to green.

Lessons Learned Regarding the Chart-on-the-Go: We use the small clothespin clips so all student clips will fit within the green section, but the don't always stay on the clipboard. Use the larger clothespins if you have smaller class sizes or clip the small pins onto the cardstock color chart clipped to the clipboard rather than the clipboard itself. Train and re-train cafeteria/playground staff. If clips are moved in the cafeteria or on the playground when the teacher is not present, students need to know exactly why clips were moved and this needs to be communicated to the teacher via an adult. 

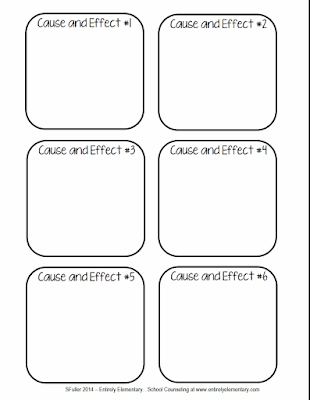
5. Reflection Sheets

It is very important that students begin: 1) to recognize their behavioral choices and how their choices affect themselves and others, 2) take accountability for their choices, and 3) to accurately reflect on their choices. If a student lands on an orange or a red, he/she spends some time reflecting in another classroom and are required to complete a reflection sheet. This sheet asks students to identify what rule was broken, how he/she was feeling, what he/she wanted, to explain what happened, to explain what he/she could have done differently, and what he/she can do to fix the choice that was made. There is a section in which the teacher can write comments, including his/her account of what happened. In addition to a phone call home, the student takes the reflection sheet home to share with his/her parents/guardians, the parent/guardian is to sign the sheet and the slip is to be returned to school.

Lessons Learned Regarding the Reflection Sheets: Students need to be taught how to fill out this reflections sheet should they ever be required to complete one. It is important that the teacher reviews any completed reflection sheets with the students in order to discuss what happened, the choices/reactions made, and what could be done differently next time. We want students to take responsibility for their actions...so it's important for them to be honest in their account. This discussion time helps to teach and reinforce this skill.

7. Communicating with Parents/Guardians

Communication with parents/guardians and educating parents/guardians on this program is vital to the success of this program! At the beginning of the school year, we send out an easy to read information page which completely describes our SWPBIS program. Any students who enroll in our school later on in the year also receives this information. A color chart explanation slip (which includes numerical codes for rule infractions) is either adhered to student assignment books or placed in student folders. Students in grades K, 1 and 2 have a monthly calendar that describes the colors and the numerical rule infraction codes. Quarterly, a 1/2 page information sheet is sent home with students telling parents when that quarter's Fun Friday's and Monthly Incentive activities will take place. This slip also tells parents how many Greens, Blues, and Purples students need to earn in order to participate in the monthly incentive. I will explain more about Fun Fridays and the Monthly Incentives in the next "SWPBIS How To" blog post.

The color each student earned for the day is either marked in his/her assignment book or on his/her calendar. If a reflection sheet needed to be filled out, that is also going home to parents/guardians that day. Also, parents are being called with any office referrals and any orange/red behavior.

We also use social media to inform parents about SWPBIS happenings. At the beginning of the year, I created a SMORE to post on our school's Facebook page informing parents of the SWPBIS Plan basics. This SMORE was also used by teachers to describe the SWPBIS program during the beginning of the year Open House. We also post on our Facebook page monthly incentive information, any volunteer/donation needs, as well as, pictures from our incentives. 

Lessons Learned Regarding Communicating with Parents/Guardians: I can't express enough how vital this communication is. We want parents to not only be informed of what the program is about, but informed about how his/her child is behaving in school and how much effort his/her child is putting forth each day. We strive to have parents/guardians as our team members in teaching their kiddos about making excellent behavioral choices and holding children accountable for their choices. So much goes home about this program - parents/guardians who spend a few minutes looking through bookbags, folders, assignment books, will find themselves informed about the SWPBIS program and how his/her child is doing on a daily basis. 

It is my hope... that through these "SWPBIS How To!" posts, you will gain some insight on the process of creating a program like this in an elementary school. It is very time consuming, but, worth it. The committee needs to be comprised of not only worker bees, but positive and influential school leaders. The program needs to be seen as a "school' program, not one particular person's "program." Finally, as I stated in the last post, I would highly recommend having an outside SWPBIS consultant/trainer work with your school team instead of doing this in-house. I think the process would go much smoother and the expertise this person brings to the table would be a much welcomed component for a team that is working to begin this new program.

Coming up....
In the next "SWPBIS How To! The Program - Part 2" post, I will talk about the rewards - Fun Friday and Monthly Incentives. I will discuss our data collection procedures, how we are beginning to use data to drive the program, and our Tier 2 intervention efforts.

For more information...
Head over to PBIS.org to find all kinds of good stuff regarding SWPBIS!